

Introduction
If you’re searching for irresistible wafer cookie recipes, you’re in the right place! Wafer cookies delight snack enthusiasts with their light, crispy texture and endless versatility. Their delicate structure and sweet flavor make them a popular choice worldwide. Whether you enjoy them as standalone snacks, layered in creamy desserts, or dipped in chocolate, wafer cookies offer endless possibilities for creativity and indulgence.
What is a Wafer Cookie?
A wafer cookie features a thin, flat, and crispy design, crafted from a simple batter of flour, sugar, and other flavorings. Bakers typically bake them until golden and light, achieving their signature crunch. Their neutral flavor complements a wide variety of desserts, making them ideal for sandwiching creamy fillings, acting as decorative layers, or adding crunch to a recipe.
What’s the Difference Between a Wafer and a Biscuit?
Wafers and biscuits share some similarities but differ in texture and purpose. Wafers offer a thinner, crispier texture with delicate layers that melt in your mouth. Biscuits, in contrast, feel thicker, crumblier, and deliver a richer flavor profile. Wafers excel in desserts due to their adaptability and subtle taste.
In this blog, you’ll find 5 irresistible wafer cookie recipes tailored to different tastes and occasions. From timeless vanilla wafers to decadent chocolate-dipped variations, these recipes will inspire your next baking adventure. Let’s explore the delicious world of wafer cookies together!
1. Wafer Cookies Vanilla
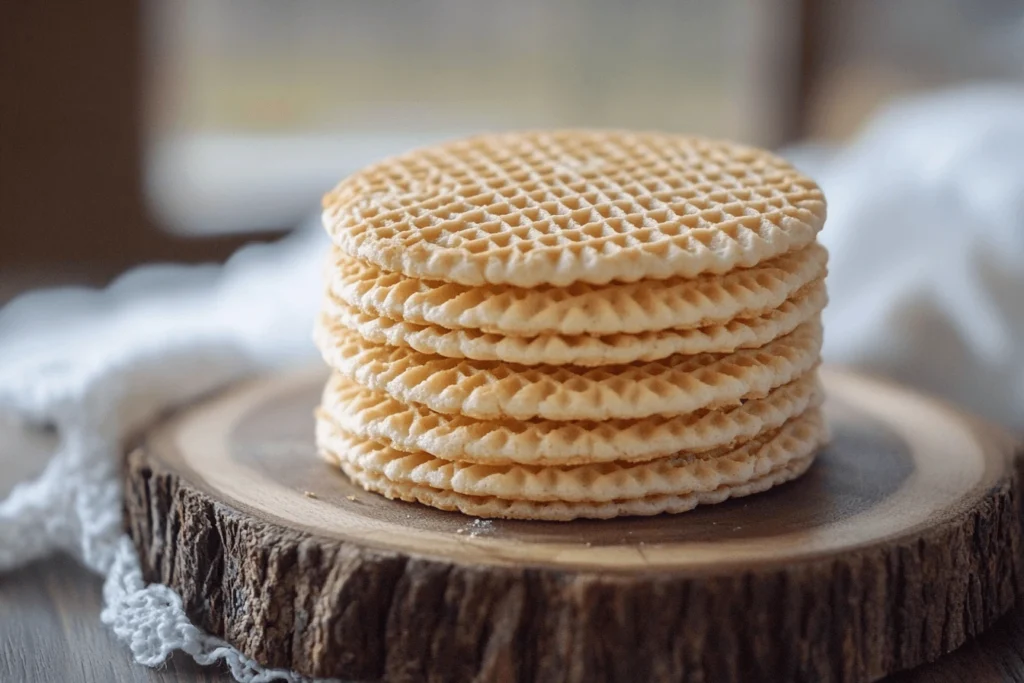
Vanilla wafer cookies are a timeless classic that never goes out of style. Their delicate, light texture and subtle vanilla flavor make them perfect for any occasion, whether you’re looking for a quick snack, a companion for your coffee, or a base for a more elaborate dessert. This recipe focuses on simplicity, bringing out the rich and fragrant taste of vanilla while ensuring the cookies stay light and crispy.
These vanilla wafer cookies are incredibly versatile. You can enjoy them on their own, use them as a crunchy layer in layered desserts like trifles, or crumble them over ice cream for an extra touch of sweetness. They are also a crowd-pleaser at tea parties, family gatherings, or holiday celebrations.
Ingredients You’ll Need
- All-purpose flour
- Unsalted butter
- Granulated sugar
- Pure vanilla extract (the key to the best flavor)
- Baking powder
- A pinch of salt
- Milk (to adjust the consistency if needed)
Tips for the Best Vanilla Wafer Cookies
- Use Pure Vanilla Extract
The quality of vanilla extract plays a huge role in the flavor of these cookies. Avoid artificial vanilla flavoring, as it doesn’t provide the same depth of flavor. If you want to elevate the recipe further, consider using vanilla bean paste or scraping fresh vanilla beans into the batter for an authentic touch. - Store Properly for Maximum Crispness
Wafer cookies are best enjoyed crisp. To keep them fresh and crunchy, allow the cookies to cool completely after baking, then store them in an airtight container. Add a silica gel pack (food-safe) to the container if you’re in a humid climate, as moisture can make the cookies soft. - Keep the Dough Thin and Even
Roll out the dough as thinly and evenly as possible. This ensures that the cookies bake uniformly and achieve their signature crispness. Uneven dough may result in some cookies being over- or under-baked. - Baking Time Matters
Watch the cookies closely during baking. Since wafer cookies are thin, they can quickly go from perfectly golden to overdone. Aim for a light golden hue for the ideal crisp and flavor. - Add a Twist if Desired
If you want to customize your vanilla wafers, try adding a pinch of cinnamon, nutmeg, or lemon zest to the batter. These subtle additions can enhance the flavor profile while keeping the cookies true to their classic roots.
Serving Suggestions
- Pair these vanilla wafer cookies with a hot cup of coffee, tea, or hot chocolate for a comforting treat.
- Use them as a base for no-bake cheesecakes or layered desserts like banana pudding.
- Serve them alongside a scoop of your favorite ice cream for a delightful crunch.
This vanilla wafer cookie recipe is an easy and rewarding treat that’s sure to please both kids and adults alike. Give it a try, and enjoy the nostalgic flavors of this timeless classic!
2. Wafer Cookies Chocolate
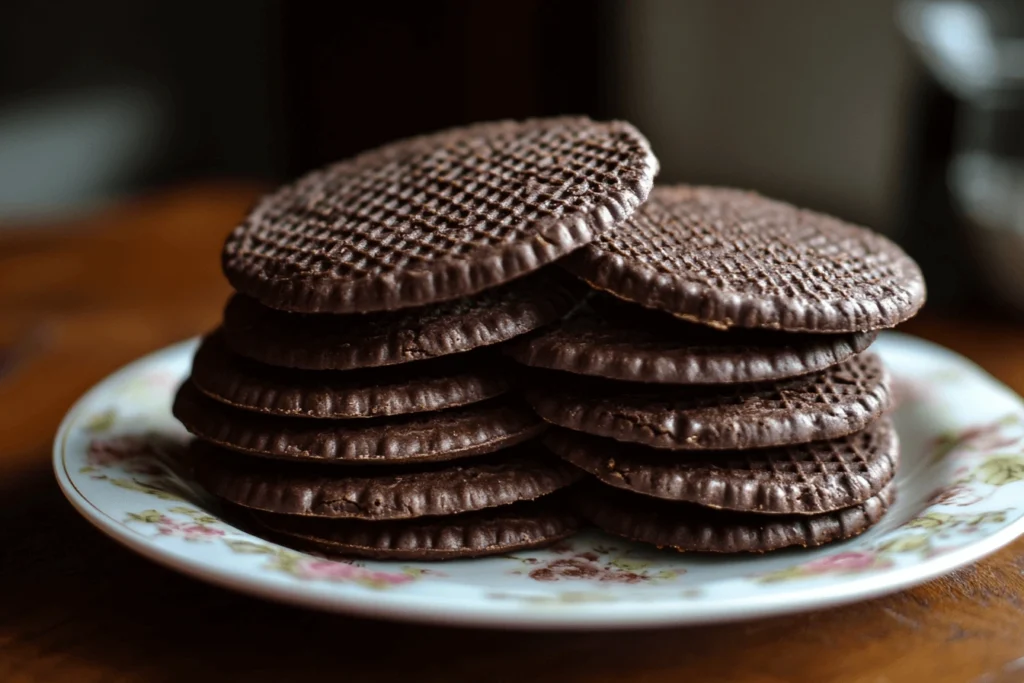
Chocolate wafer cookies are a delightful twist on the classic wafer, combining the light and crispy texture of wafers with the rich, velvety taste of chocolate. These cookies are perfect for chocolate lovers who want a treat that’s both indulgent and satisfying. The addition of a chocolate coating not only elevates their flavor but also transforms them into a visually appealing dessert suitable for parties, gifting, or an everyday indulgence.
Dipping the wafers in chocolate opens up endless possibilities for customization. Whether you prefer dark, milk, or white chocolate, the choice of chocolate can change the flavor profile to suit your taste. Adding toppings like sprinkles, crushed nuts, or coconut flakes enhances both the texture and appearance, making these cookies as fun to create as they are to eat.
Ingredients You’ll Need
- Plain wafer cookies (store-bought or homemade)
- High-quality chocolate (dark, milk, or white)
- Toppings: sprinkles, crushed nuts, shredded coconut, or edible glitter
- Optional: a pinch of sea salt for a sweet-savory twist
Tips for the Best Chocolate Wafer Cookies
- Choose the Right Chocolate
Use high-quality chocolate for dipping to achieve a smooth, glossy finish and rich flavor. Melt the chocolate gently in a double boiler or microwave in short intervals, stirring in between to prevent burning. - Customize the Toppings
Before the chocolate sets, sprinkle your favorite toppings onto the dipped wafers. Crushed almonds or hazelnuts add a nutty crunch, shredded coconut offers a tropical flair, and colorful sprinkles make them festive for birthdays or holidays. - Use a Cooling Rack
After dipping the wafers, place them on a cooling rack lined with parchment paper to allow excess chocolate to drip off. This ensures a clean finish and prevents the cookies from sticking to the surface. - Chill for a Perfect Set
Place the dipped and decorated wafers in the refrigerator for 15-20 minutes to help the chocolate set quickly and achieve a firm, glossy coating. - Experiment with Flavored Chocolates
Infused chocolates, such as mint or orange-flavored varieties, can add an extra layer of complexity to your wafer cookies.
Serving Suggestions
- Arrange these chocolate wafer cookies on a platter for dessert tables at parties or gatherings.
- Serve them with a scoop of vanilla or strawberry ice cream for a decadent dessert.
- Package them in decorative boxes or bags for gifting during holidays or special occasions.
Variations to Try
- Double Chocolate Wafer Cookies: Use chocolate-flavored wafers and dip them in melted chocolate for an extra dose of chocolaty goodness.
- Drizzle Effect: Instead of fully dipping the wafers, drizzle melted chocolate over them for a lighter coating and an artistic look.
Chocolate wafer cookies are a treat that’s easy to prepare and sure to impress. Whether you’re making them for yourself or sharing with loved ones, these cookies combine classic simplicity with indulgent flair to create an unforgettable dessert experience.
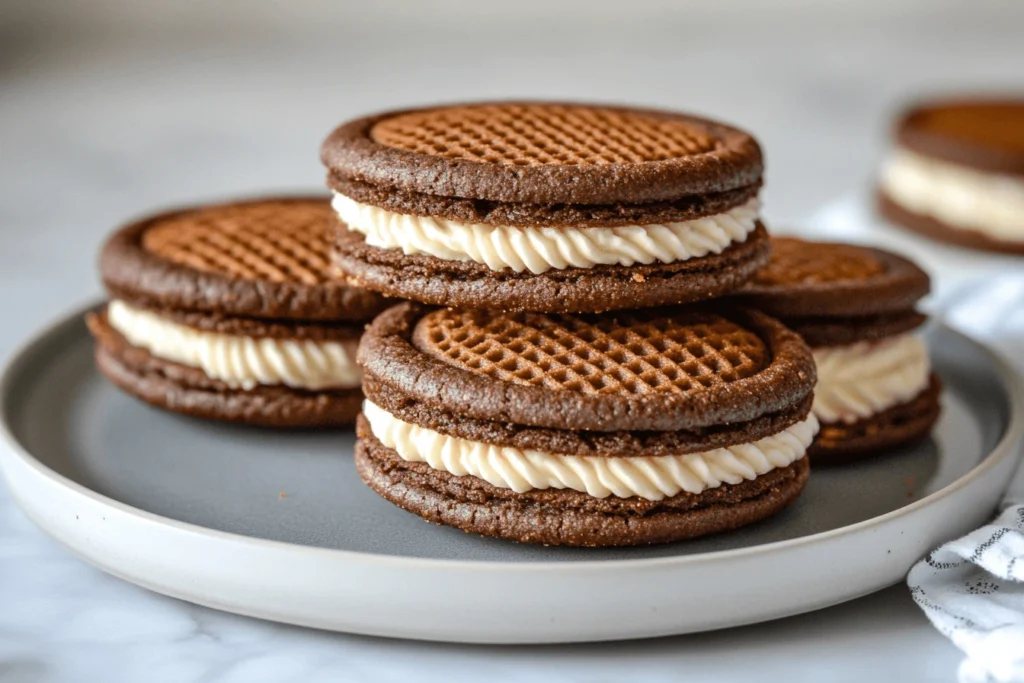
3. No-Bake Wafer Cookie Sandwiches An Irresistible Wafer Cookie Recipe
No-bake wafer cookie sandwiches are one of the easiest and most irresistible wafer cookie recipes to try. Not only are they simple to make, but they also require minimal preparation time. Using pre-made wafer sheets as the base, this recipe allows you to create a dessert that is both visually appealing and delicious. Whether you’re preparing these for a party, an afternoon snack, or a quick dessert fix, this recipe offers endless possibilities for customization.
Ingredients
To get started, gather the following ingredients:
- Pre-made wafer sheets (plain or flavored)
- Filling options:
- Chocolate ganache
- Nutella or hazelnut spread
- Peanut butter
- Flavored cream cheese (e.g., strawberry or vanilla)
- Whipped frosting or buttercream
- Optional toppings: melted chocolate, powdered sugar, or crushed nuts
Steps to Make This Irresistible Wafer Cookie Recipe
Follow these simple steps to create your no-bake wafer cookie sandwiches:
- Prepare the Filling
First, select your desired filling based on your taste preferences or the occasion. For instance, if you want a rich, chocolaty flavor, opt for chocolate ganache or Nutella. On the other hand, flavored cream cheese provides a tangy-sweet option. Whisk the filling until smooth for easy spreading. - Assemble the Layers
Next, lay one wafer sheet on a flat surface. Then, spread a generous layer of your chosen filling evenly across the wafer, ensuring the entire surface is covered. Afterward, place another wafer sheet on top and press gently to secure the layers. If you prefer a taller dessert, repeat these steps to create additional layers. - Refrigerate for Setting
Once assembled, wrap the wafer sandwich tightly in plastic wrap or place it on a baking sheet lined with parchment paper. For the best results, refrigerate the sandwich for at least an hour to allow the filling to set. As a result, the layers will firm up and make slicing much easier. - Cut and Serve
Finally, after the sandwich has set, use a sharp knife to cut it into bite-sized squares, rectangles, or any shape you prefer. This step ensures a neat presentation and easy serving.
Tips
To make your wafer cookie sandwiches even more irresistible, consider these tips:
- Experiment with Fillings for Customization
The filling plays a significant role in these sandwiches, making them one of the most versatile irresistible wafer cookie recipes. For example, you can try combinations like peanut butter and jelly, caramel and chocolate, or lemon curd and whipped cream. Additionally, you can add texture with crushed nuts, cookie crumbs, or dried fruits. - Decorate for Extra Appeal
To make your sandwiches stand out, drizzle melted chocolate over the top, sprinkle powdered sugar, or add crushed nuts for a decorative finish. As a bonus, these touches also enhance the flavor and texture. - Chill Before Slicing
Proper chilling is essential for clean slices. Otherwise, the filling may ooze out, making the sandwiches messy. If you’re short on time, place the sandwich in the freezer for 20-30 minutes for a quicker set.
4. Gluten-Free Wafer Cookies A Delicious Alternative for Everyone
For those with gluten sensitivities or dietary restrictions, gluten-free wafer cookies are the perfect solution. These light, crispy treats offer all the satisfaction of classic wafers without the gluten. This recipe uses almond or rice flour to achieve a texture that’s just as delicate and flavorful as the original. Whether you’re craving a quick snack or looking for a versatile base for your desserts, gluten-free wafer cookies are sure to impress.
The versatility of gluten-free wafer cookies makes them a favorite among both gluten-free eaters and those who simply love delicious baked goods. You can enjoy them plain, enhance them with subtle flavors like vanilla or lemon, or use them in more elaborate recipes, such as layered desserts or sandwich cookies.
Ingredients
To make these gluten-free wafer cookies, you’ll need:
- Dry Ingredients:
- Almond flour or rice flour (for a gluten-free base)
- Tapioca starch or cornstarch (to add crispness)
- A pinch of salt
- Wet Ingredients:
- Eggs or egg whites (for binding)
- Sugar (or a sugar substitute for a lower-calorie option)
- Pure vanilla extract
- Butter or a dairy-free alternative (e.g., coconut oil for a vegan option)
Steps to Make Gluten-Free Wafer Cookies
- Prepare the Dough
Begin by whisking together the almond or rice flour, starch, and salt in a mixing bowl. In a separate bowl, beat the eggs, sugar, and vanilla extract until frothy. Gradually fold the dry ingredients into the wet ingredients until you achieve a smooth batter. If the batter feels too thick, thin it slightly with water or milk to ensure a spreadable consistency. - Shape the Wafers
Preheat your oven to 350°F (175°C). Line a baking sheet with a silicone baking mat or parchment paper to prevent sticking. Spread the batter into thin, even circles or rectangles on the baking mat. This ensures the gluten-free wafer cookies will bake evenly and turn out crispy. - Bake to Perfection
Place the baking sheet in the oven and bake for 8-10 minutes, or until the edges of the cookies turn golden brown. Keep a close eye on them, as gluten-free flours tend to bake faster than traditional flours. Once baked, let the cookies cool completely on the baking mat to prevent breakage. - Serve or Store
Once cooled, enjoy your gluten-free wafer cookies immediately or store them in an airtight container for up to a week. Proper storage helps maintain their crispness and flavor.
Tips for Perfect Gluten-Free Wafer Cookies
- Use a Silicone Baking Mat
A silicone baking mat ensures that your gluten-free wafer cookies don’t stick to the baking surface, which is especially important for delicate batters like these. - Monitor Baking Time Closely
Gluten-free batters can brown quickly, so watch the cookies carefully as they bake. Remove them from the oven as soon as the edges turn golden to avoid over-baking. - Customize the Flavor
Add a personal touch to your gluten-free wafer cookies by mixing in natural flavors like lemon zest, orange extract, or a hint of cinnamon. For a chocolaty variation, include cocoa powder in the batter or drizzle melted chocolate over the cooled wafers. - Create Consistent Shapes
For professional-looking gluten-free wafer cookies, use a piping bag to distribute the batter evenly onto the baking mat.
Serving Suggestions
- Pair these gluten-free wafer cookies with coffee, tea, or hot cocoa for a satisfying snack.
- Use them as a base for layered desserts like no-bake cakes or ice cream sandwiches.
- Top them with fresh fruit and whipped cream for an elegant, gluten-free dessert.
5. Layered Wafer Cookie Bars A Decadent Irresistible Wafer Cookie Recipe
Layered wafer cookie bars are a standout dessert in the world of irresistible wafer cookie recipes. Combining the crispiness of wafer sheets with the richness of chocolate and caramel, these bars offer a chewy, crunchy, and indulgent treat. They are perfect for celebrations, holidays, or whenever you’re craving something sweet and satisfying.
What sets these layered bars apart from other irresistible wafer cookie recipes is their visual appeal and versatility. You can customize the layers to match your flavor preferences or add unique ingredients like peanut butter, Nutella, or crushed nuts. These bars are as delicious as they are impressive, making them a favorite for both novice bakers and dessert enthusiasts.
Ingredients
To create this delectable variation of irresistible wafer cookie recipes, you’ll need:
- Wafer sheets (store-bought or homemade)
- Melted chocolate (dark, milk, or white, based on preference)
- Caramel sauce or dulce de leche
- Optional layers:
- Nutella or peanut butter
- Crushed nuts (almonds, hazelnuts, or walnuts)
- Shredded coconut or dried fruits
- Optional toppings: chocolate drizzle, sea salt, or colorful sprinkles
Steps to Make Layered Wafer Cookie Bars: An Irresistible Recipe
- Prepare the First Layer
Lay a wafer sheet on a flat surface, such as a baking tray lined with parchment paper. Spread a thin, even layer of caramel sauce or dulce de leche across the wafer, ensuring it reaches all edges. - Build the Layers
Next, spread melted chocolate over the caramel layer and sprinkle optional ingredients like nuts or shredded coconut. Add another wafer sheet on top, pressing firmly to secure the layers. Repeat the process until you have 4-6 layers, creating a visually stunning bar. - Top and Decorate
For the top layer, spread a generous coating of melted chocolate. Decorate with a drizzle of white chocolate, a sprinkle of crushed nuts, or sea salt for contrast. - Chill to Set
Refrigerate the layered stack for 1-2 hours to allow the chocolate and caramel to set completely. Chilling is essential for clean cuts and well-defined layers. - Slice and Serve
Once set, use a sharp knife to cut the stack into bars or squares. Clean the knife between cuts for a polished presentation.
Tips
- Press Layers Firmly
To ensure the layers stay intact, press each layer firmly as you build the stack. This prevents the bars from falling apart during slicing or serving. - Chill Before Cutting
Always chill the stack before slicing. Chilled layers not only hold their shape but also make it easier to achieve neat, professional-looking cuts. - Experiment with Flavors
These bars are one of the most customizable irresistible wafer cookie recipes. Try adding fruity jam, hazelnut spread, or flavored creams to the layers for a unique twist. - Enhance the Presentation
Decorate the bars with melted chocolate drizzles, a dusting of powdered sugar, or colorful sprinkles to make them look as good as they taste.
Serving Suggestions for This Irresistible Wafer Cookie Recipe
- Serve these bars at parties, holidays, or family gatherings as a crowd-pleasing dessert.
- Pair them with coffee, tea, or hot chocolate for a delightful snack.
- Wrap them individually in decorative packaging for homemade gifts or party favors.
Conclusion: The Endless Joy of Irresistible Wafer Cookie Recipes
Wafer cookies are more than just a treat—they’re a canvas for creativity and a testament to how simple ingredients can create something truly special. Throughout this blog, we’ve explored five irresistible wafer cookie recipes that demonstrate the incredible versatility and ease of making these delightful treats at home. Whether you’re a seasoned baker or just starting out, these recipes show that you don’t need complex techniques or expensive ingredients to craft desserts that everyone will love.
Recapping the Highlights
First, we covered the classic vanilla wafer cookies, which are perfect for snacking or pairing with coffee. Then, we moved on to chocolate-dipped wafers, offering a rich and indulgent twist. For those who prefer quick and easy desserts, the no-bake wafer cookie sandwiches provided a simple yet customizable option. Meanwhile, gluten-free wafer cookies offered a solution for those with dietary restrictions. Finally, the layered wafer cookie bars brought decadence to the table, combining chewy caramel, rich chocolate, and crispy wafers into one irresistible dessert.
Why You Should Try These Recipes
- Simplicity: These recipes are easy to follow, making them accessible for bakers of all skill levels.
- Versatility: Wafer cookies can adapt to a variety of flavors, occasions, and personal preferences.
- Creativity: With endless possibilities for customization, you can add your unique twist to any recipe.
Your Next Step
Now that you’ve discovered these irresistible wafer cookie recipes, it’s time to bring them to life in your kitchen. For instance, you might start with the classic vanilla wafers before experimenting with your favorite toppings or fillings. Additionally, don’t be afraid to mix flavors or add unexpected ingredients to create your signature wafer cookie dessert.
Join the Conversation
We’d love to hear from you! Have you tried any of these recipes? If so, which one was your favorite? Or, perhaps you’ve come up with your own creative variation? Share your thoughts, tips, or even your favorite wafer cookie memories in the comments below. Your ideas might inspire others to try something new and exciting.
Final Thoughts
In conclusion, baking is about more than just the final product—it’s about the joy of experimenting, sharing, and savoring your creations. Wafer cookies embody this spirit perfectly, offering simplicity, versatility, and room for innovation. Whether you’re making them for a special occasion or enjoying a quiet afternoon snack, these recipes promise to add a touch of sweetness to your day.
Thank you for joining us on this delicious journey through the world of irresistible wafer cookie recipes.
1 thought on “5 Irresistible Wafer Cookie Recipes You Can Make at Home”